
Dirtying up all that shiny unrealistic texture maps, one has painted for that worn and used space ship, can be a tedious and timeconsuming task.
But since the advance of DDO, Substance Painter and whatnot tools there are for easing a texture artists workflow, it got a lot easier (and more fun): load in your baked maps, hit the buttons, adjust a few sliders and voila, you got yourself a pretty, dirty and worn textureset.
The only problem: Modo 801 doesn’t have a Render Output for Curvature Maps by default, and those are pretty essential to get all the scratches in the right places.
There are a ton of tutorials on the interwebs, involving some tricks with Normal and Ambient Occlusion maps in Photoshop, but since the addition of the Occlusion Layer in Modo, it’s actually quite simple to render them in your standard baking workflow.
The following setup uses 2 Occlusion Layers and the Diffuse Coefficient Render Output, which is mostly unused by me anyway. Please keep in mind, this method does only work when you directly bake your maps from the highres model to the lowres.
You can’t create Curvature Maps from the lowres model and the Normal Map, because the Occlusion Shader just takes the real geometry as input! You’d have to use Substance Designer for that or the before mentioned Photoshop trickery.
Set up the 2 Occlusion Layers as follows:
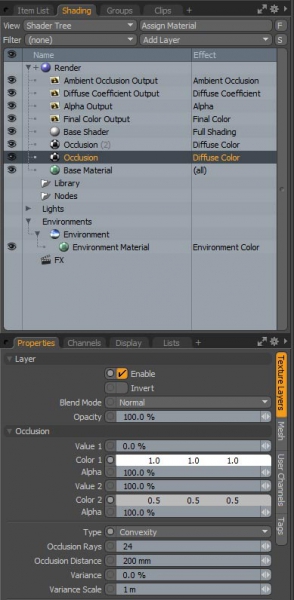
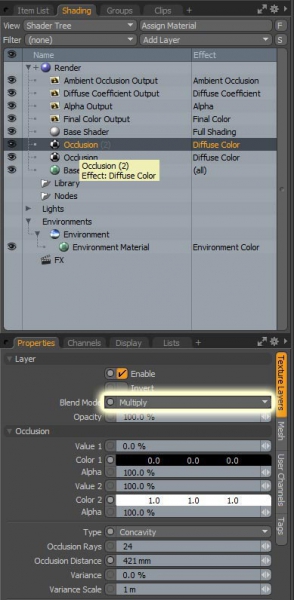
First layer is for Convexity, second for Concavity.
Set the colors like in the screens and don’t forget to set the second layer to ‘Multiply’. Adjust the other parameters (Occlusion Distance, Angles) so all your details get picked up.
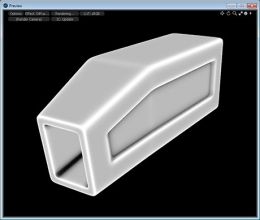
If you now bake to the Render Outputs the Diffuse Coefficient should give you a shiny Curvature Map to be used in tools like Substance Painter.
